Few days ago, our reader brought up an interesting observation on installing a themepack created from Windows 8 onto Windows 7. Apparently, Microsoft has changed the themepack extension from Windows 7 to deskthemepack in Windows 8 and 8.1. Not sure what’s the reason behind this, but it causes new themes created on Windows 8 or 8.1 no longer compatible on Windows 7. If you try to open .deskthemepack you will get a prompt from Windows telling you “Windows can’t open this file: To open this file, Windows needs to know what program you want to use to open it …”
Here is a quick fix on how to run deskthemepack themes on Windows 7 (no additional tools required)
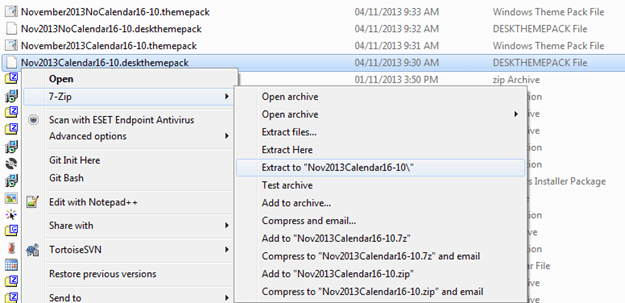
Since deskthemepack or themepack are essentially just a special zip file, you can use any compress utility to un-compress or unzip themes into a separate folder. In this case I will use 7-zip to unzip the Nov2013Calendar16-10.deskthemepack into it’s own folder.
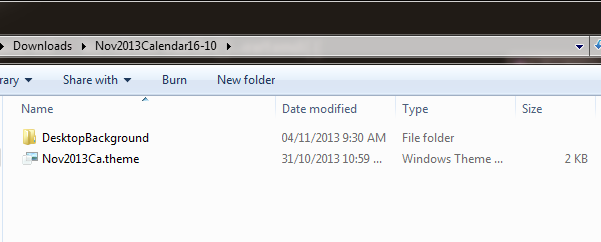
Navigate to the location you extracted the file. You will find there is a sub folder called “DesktopBackground”.
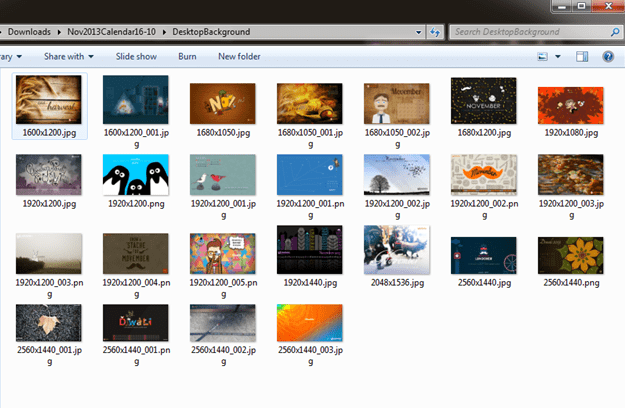
Open this folder will reveal all the images from the theme pack.
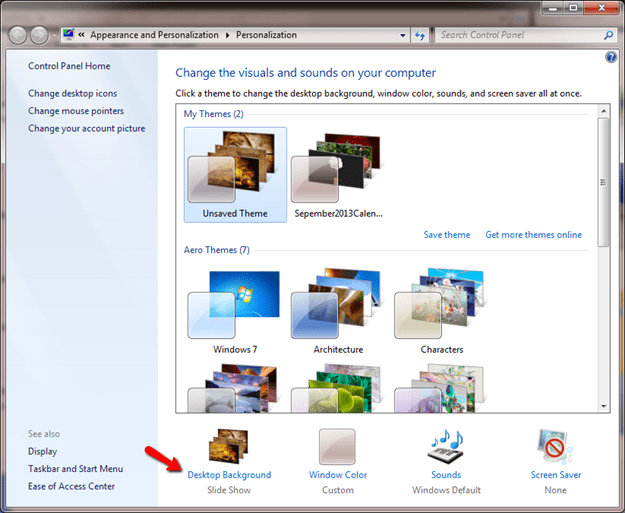
The rest is now simple, all you need to do is to go navigate to Control Panel > Appearance and Personalization > Personalization
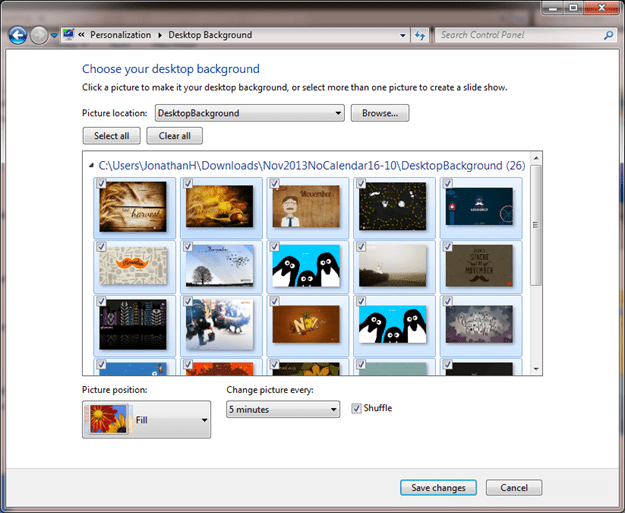
Click the Desktop Background. This will allows you to pick a folder of images to set as your theme.
You can now navigate to the location previously where you have the DesktopBackground folder extracted and select them as your images.


Pretty awesome. Thank you. Can’t stand Win 10 so this is really good info.