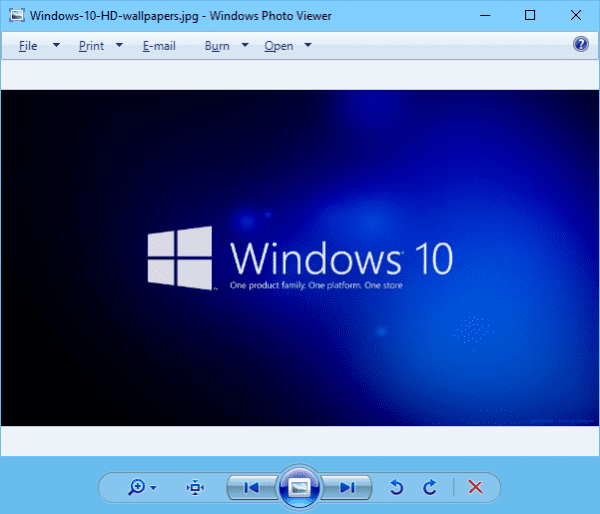
If you are on Windows 10, you may notice that the default photo app, which used to be Windows Photo Viewer, has been replaced by the modern Photo app which looks much like the new Edge browser. While it seems no reason you need to switch back, some of you may still prefer the old Windows Photo Viewer for its simplicity.
If that’s the case, here is what you can do.
To set Windows Photo Viewer as default Photo app
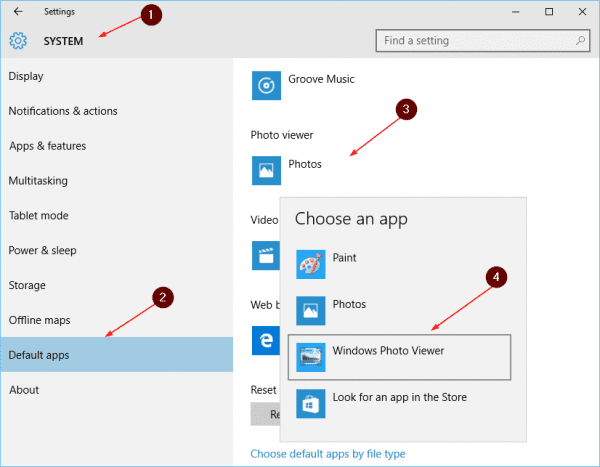
Click Start Menu, Settings to open Settings app. Then go to System, switch to Default apps section, scroll down a little to find Photo viewer. Click Photos, and pick Windows Photo Viewer from the list.
Close Settings app and it’s all done. Next time when you double-click a picture file to open it, you will see the picture in Windows Photo Viewer instead.
If you only want to open a picture in Windows Photo Viewer
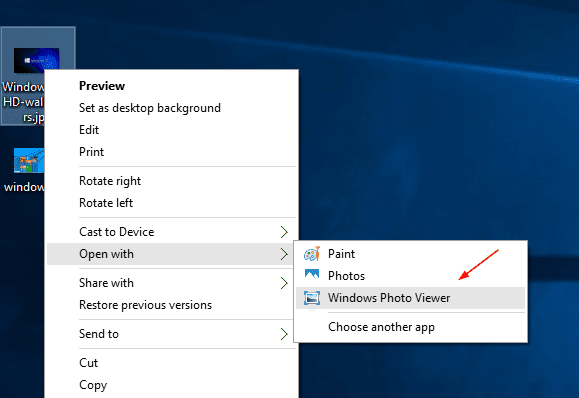
Maybe you just want to use Windows Photo Viewer occasionally but still would like to leave the Modern Photo app as default Photo app. If that’s the case, you can simply right-click the picture you want to open, go to Open with…, and choose Windows Photo Viewer.
What if I don’t see Windows Photo Viewer in the list?
Most likely that’s because your Windows 10 is a fresh install not an upgrade from Windows 7 or Windows 8. If that’s the case, you can download a registry file from below and import it into your Windows 10. And then try again the steps described above.


