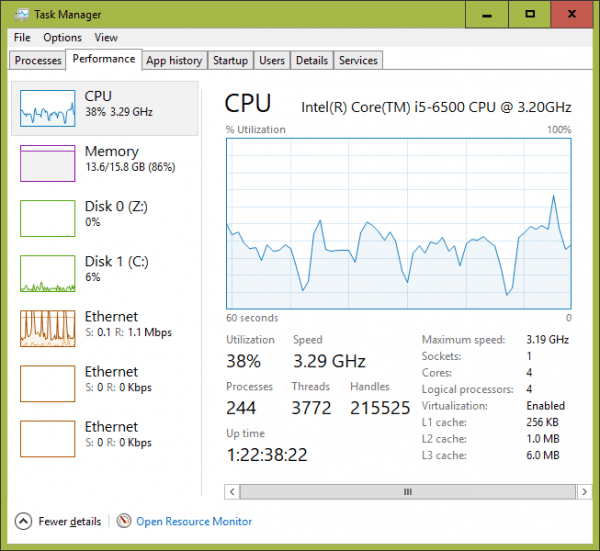
Windows 7 displays all CPU cores in Performance tab in Task Manager by default but it’s not the case in Windows 10. When you open Task Manager in Windows 10 and go to Performance tab, here is the CPU usage graph you see by default, an overall utilization of all cores available in the process.
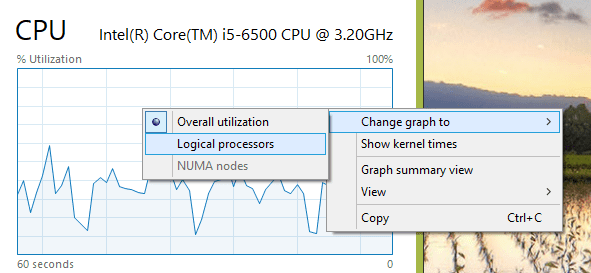
But you can change the view to display all cores if you like. Right-click inside the CPU graph, choose Change graph to and Logical processors.
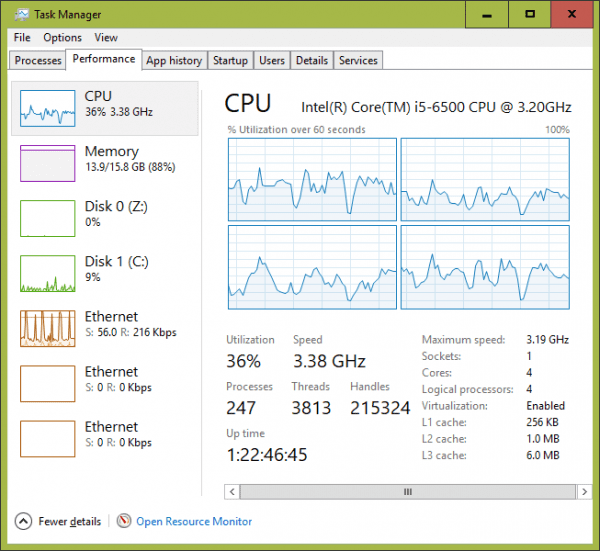
The CPU graph changes to the way it is in Windows 7, like below.
Was this article Helpful?
Thank you for the feedback!


absolutely useless. My windows 10 PC doesn’t show that in the task manager
If the Task Manager has a Performance tab, Put the mouse curser inside the CPU graph then press the right (menu) button. From here, follow the instructions in this article. Admin controls can limit functions on this panel to displaying task only.
Also; The “More details/Fewer details” selector in the lower left corner of this panel, needs to say “Fewer details” in order for the Performance tab to show.
@Tom – what a dick. Clearly not able to follow instructions…
HAHAHAHAHAHHAHAHA
Man out here running a single core machine
haha i have 4 cores
Thanks Luke Cool
@Tom Tom, maybe you should stick with being a short order cook and leave the rest of the world to us…
Thanks Kent – appreciate you taking the time to share
It would have helped if you had mentioned that you have to right click the lower “tabs” bar to get the menu that shows the selection to select logical processors. I tried for ten minutes before discovering it.
Very helpful! Thanks a bunch
I am asking for cores usage NOT logical processor.
Mine shows 12 graphs but is labeled “AMD Ryzen 5 3600X 6-Core Processor” – so it does appear to be threads not physical cores.
My shows 16 threads, I’m running an 8-core 16 threads… Intel 11800H!!!!!!!