

Mapping a network drive in Windows is a basic task for a lot of users and you can do so in a number of ways. Sometimes you just want to manually map to a drive temporarily to use certain applications, other times, you may want to include the mapping action in a script so the drive can be mapped automatically during the login.
Here are three ways that you can use to map a network drive in Windows 10.
Use File Explorer
There are three ways to map a network drive through File Explorer in Windows 10. Let’s go through them one by one.
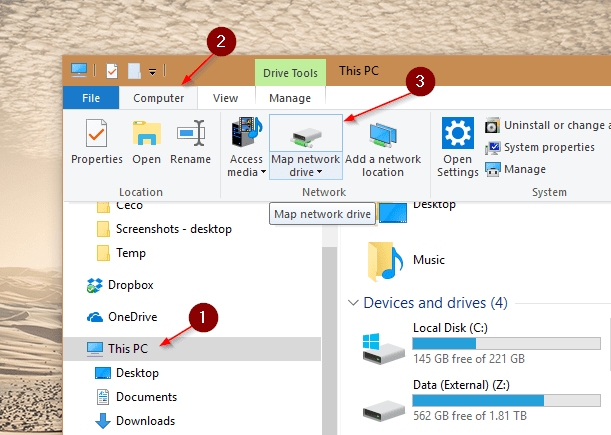
1. Click This PC first, then Computer tab at the top, and the Map network drive button that shows up on the ribbon.
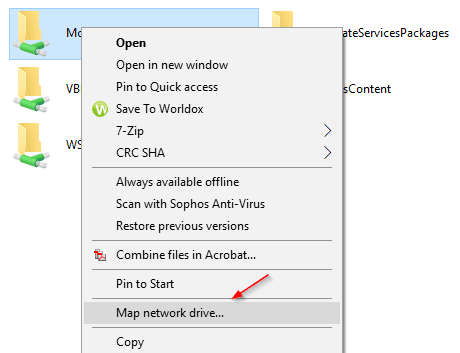
2. Navigate to the server that has the shared folder you want to map, right click on that folder and choose Map Drive
3. You can also go to Home tab at the top, click Easy access that shows up in the ribbon, and choose Map as drive.

Whichever way you take, once you click that Map drive button, the following dialog box pops up. Select an available drive letter from the Drive drop-down list, and put in the folder on the remote server. Click Finish and done.

Use Net command line
Open a Command Prompt window and run
net use drive-letter \\server\sharefolder
If you don’t know which drive letter to use, you can simply put a * there and the Net command will automatically pick the next available drive letter for you.
net use * \\server\sharefolder
You can either put the line in a login script so it gets mapped automatically, or add the switch /Persistent:yes to tell the system the map is permanent.
The PowerShell way
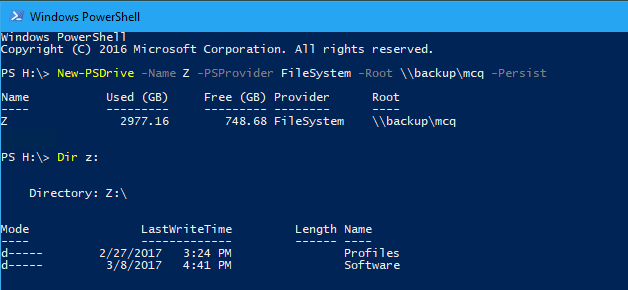
Obviously, the powerful PowerShell also has a cmdlet that supports SMB shares beginning in PowerShell 3.
New-PSDrive -Name drive-letter -PSProvider FileSystem -Root \\server\sharefile -Persist
That’s about it. Enjoy and happy mapping.
Amazing, thank you