

Wireless Fidelity, or WiFi, is a connection technology that allows devices to communicate but does not require cables. On rare occasions, Windows 11 may notice their WiFi not working.
This issue may be caused by a problem with the WiFi adapter, router, settings on Windows 11, outdated drivers, or even an antivirus application. Regardless of the cause, we discuss some easy solutions in this guide.
How do I Fix Windows 11 WiFi Connection Problems?
Pre-solution 1: Ensure WiFi is Turned On
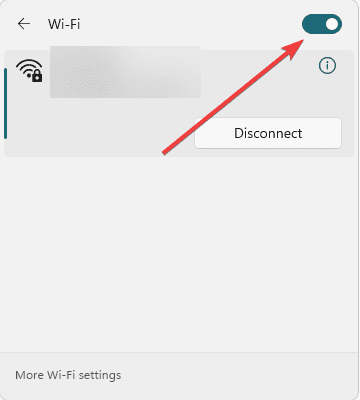
Before going into complex fixes, double-check that you have Wifi enabled. Some devices have a button on the keyboard or physical switch. However, you may turn on WiFi on the network settings using the steps below:
Step 1: Click the Taskbar’s network icon.

Step 2: Click the Wifi forward pointing arrow to expand options.
Step 3: Toggle on the Wi-Fi switch.
Pre-solution 2: Disable Airplane Mode
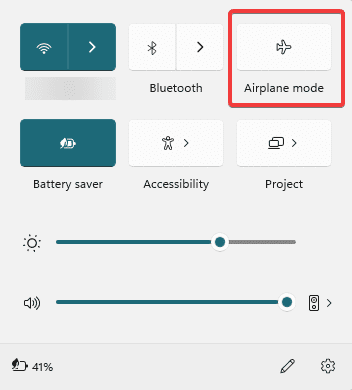
Airplane Mode will stop all wireless connections, like Bluetooth and WiFi, on a Windows 11 device. While it is useful in a sensitive location or an airplane, it should be disabled if you need any wireless connection.
Step 1: Click the Taskbar’s network icon.
Step 2: If enabled, click the icon with a plan to disable it.
1. Run the Network and Internet Troubleshooter
The Windows 11 Network and Internet troubleshooter automatically detects WiFi problems by testing hardware and software. It checks for outdated or corrupt drivers, resets WiFi adapters, and fixes related issues. Here is how to run the troubleshooter:
Step 1: Click Windows + I to open the Settings app.
Step 2: Click Troubleshoot on the right pane of the Settings app.

Step 3: Click Other troubleshooters.

Step 4: Click the Run button for Network and Internet.
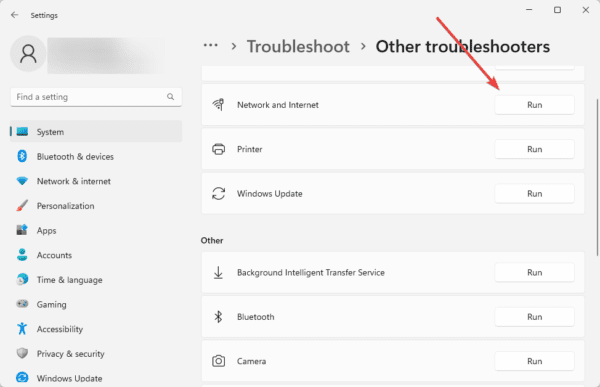
Step 5: Apply the recommended fixes.
2. Update or Reinstall Network Drivers
Drivers are a vital connection between hardware and software. So when your network drivers are outdated, it can cause connection issues between your wireless devices and Windows 11. Here is how to update your Network drivers:
Step 1: Click the Start menu and select the Device Manager option.

Step 2: Expand Network adapters, right-click on your driver, and select Update driver.
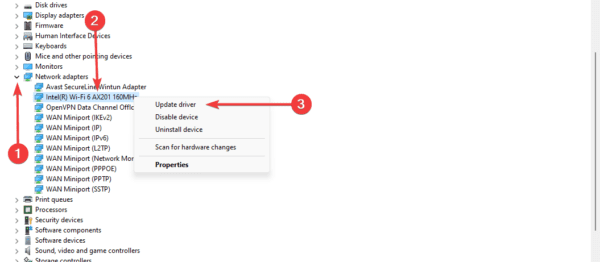
Step 3: Click Search automatically for drivers.

Step 4: Follow the wizard to complete the update.
Alternatively, you may reinstall the Network adapter. Reinstalling the Network driver will remove corrupt or outdated drivers. This is a practical solution if Windows 11 WiFi is not working because of corruption. Here are the steps to follow:
Step 1: Click the Start button and select Device Manager.
Step 2: Expand the Network Adapters category, right-click on your driver, and select Update device.
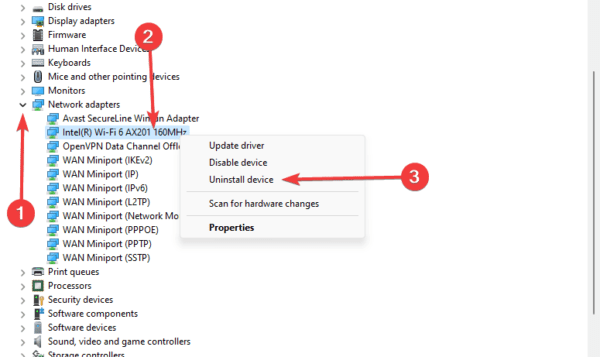
Step 3: Confirm your choice by selecting Uninstall.

Step 4: Restart your computer, open the Device Manager, and click the Scan for hardware changes icon to reinstall the driver.

3. Restart vital WiFi Services
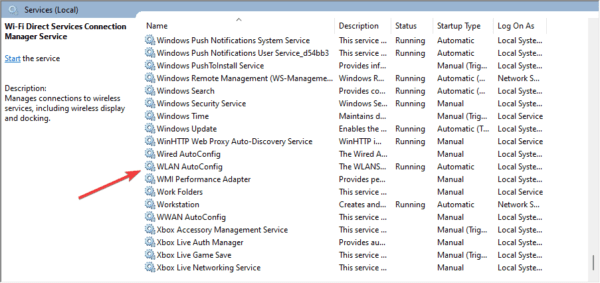
Restarting the WiFi services will clear any temporary errors and glitches. It will reset your network adapter settings to default and may install newer driver versions. A few services to restart include WLAN AutoConfig and the Network Connection Broker service. You can reset these services using the steps below:
Step 1: Type services in Windows Search and select the Services app.

Step 2: Double-click WLAN AutoConfig Service.
Step 3: Click the Stop button, then Apply and OK.
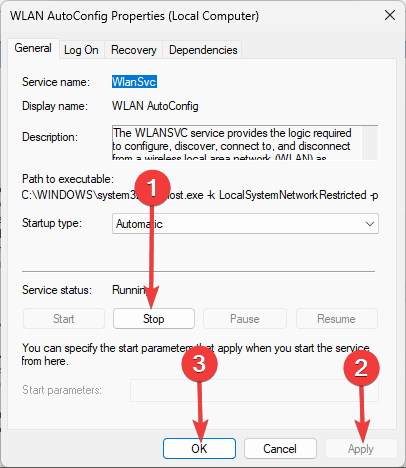
Step 4: Once again, double-click WLAN AutoConfig Service; this time, change the Startup type to Automatic, click the Start button, then click Apply and OK.

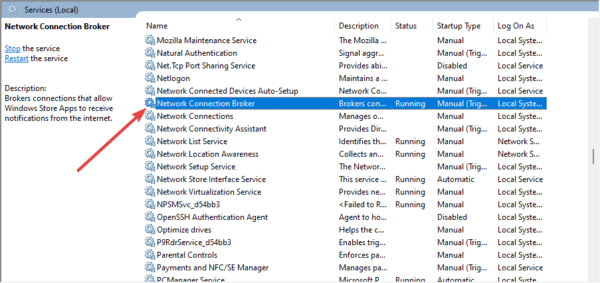
Step 5: Perform steps 2 to 4 for Network Connection Broker service.
4. Flush DNS
Flushing the DNS will clear the stored DNS cache, a database of IPs your computer most recently looked up. This is helpful because your Windows 11 WiFi may only work if the cache is correct. Here is how to flush the DNS cache:
Step 1: Press Windows + R to open the run dialog, input cmd, and press Ctrl + Shift + Enter to open an elevated Command Prompt.

Step 2: Input the command below and hit Enter after each one to reset the DNS cache.
netsh winsock reset
netsh int ip reset
Step 3: Input the script below and hit Enter after each one to flush the DNS cache.
ipconfig /release
ipconfig /renew
ipconfig /flushdns
Step 4: Enable your WiFi and try connecting to the internet.
5. Use the Network Reset Settings
The network reset utility will revert all network settings to their defaults. This solution will fix any problems triggered by corrupted or outdated network settings. Here is how to use the Reset setting:
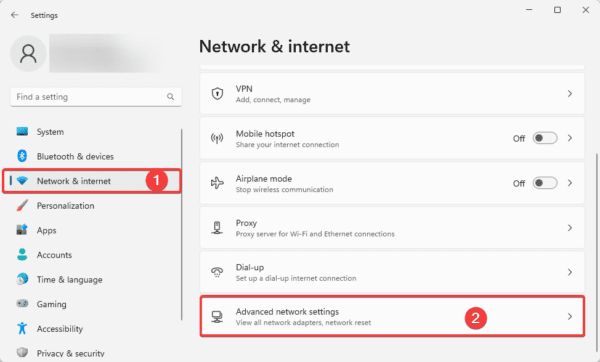
Step 1: Press Windows + I to open the Settings app.
Step 2: Click Network & internet on the left pane, and on the right, click Advanced network settings.
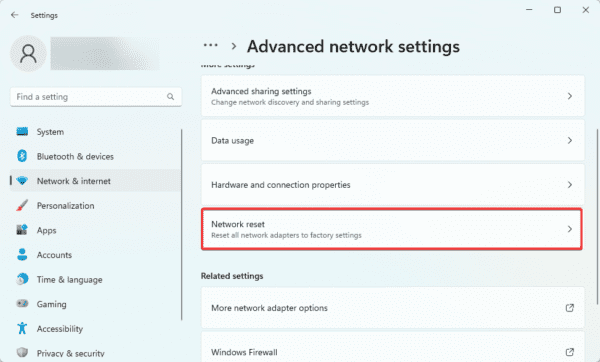
Step 3: On the right pane, click Network reset.
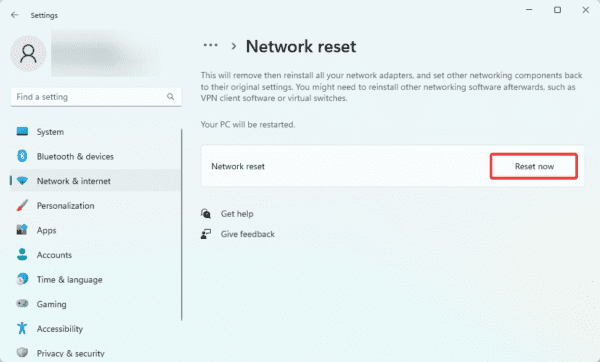
Step 4: Click the Reset now button.
6. Temporary Disable your Antivirus System
Antivirus programs may sometimes block WiFi connections. This is more likely if you use third-party tools incompatible with your operating system. You should temporarily disable it and use more reliable anti-malware programs. The way you disable the program will be unique for each brand, so go through your manufacturer’s website to disable it.
FAQ on Windows 11 WiFi not Working
1. How do I fix my Wi-Fi driver on Windows 11?
You may run the network troubleshooter, update the driver, or completely reinstall it using some solutions discussed in this guide.
2. How do I enable Wi-Fi on Windows 11?
Simply toggle on the WiFi icon, as we discussed in pre-solution 1. You may also enable it from the settings app.
3. Why does my Wi-Fi keep disconnecting on Windows 11?
You may encounter this problem because of a router problem, a problem with your Windows 11 settings, driver software, or antivirus software.
4. How do I reset my network adapter Windows 11?
Running the netsh winsock reset and netsh int ip reset command on an elevated Command Prompt will reset the network adapter on Windows 11
Uninterrupted WiFi Connection
The solutions in this guide will help you achieve an uninterrupted WiFi connection. We have not written these fixes in any particular order, so we recommend using whichever seems the most appropriate to your situation.
Lastly, please let us know what worked for you in the comments below.