

Yes, Windows 10 has a screen recording feature built-in, and it’s part of Xbox integration, known as Game Bar. Here is how to use it, very easy, intuitive, and works seamlessly with any apps you want to record.
First of all, open the app you need to the screen recording, and press Win + G. If this is the first time you are doing this, the following pop-up pops up inside the app.
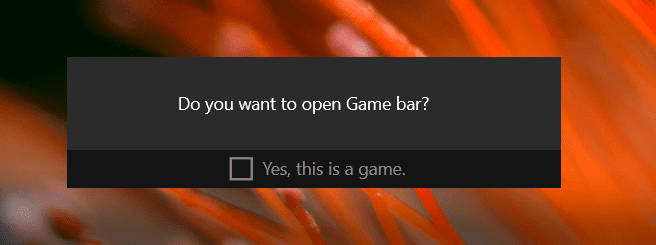
Click Yes, this is a game, the Game bar shows up.

Then, click Red dot icon or press Win + Alt + R to start recording. A red timer will show up at the upright corner indicating how long the screen has been recorded.
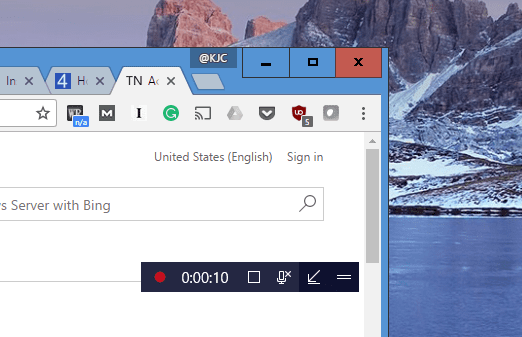
To stop, either click the Square box button or press Win + Alt + R again.
The nice thing is that Xbox remembers the Game Bar setting in the app so next time when you open the same app, you can start recording or screen capturing directly without press Win+Q to bring up the Game Bar.
- Win + Alt + R – to start/stop a screen recording.
- Win + Alt + PrtScr – to take a screenshot of the app.
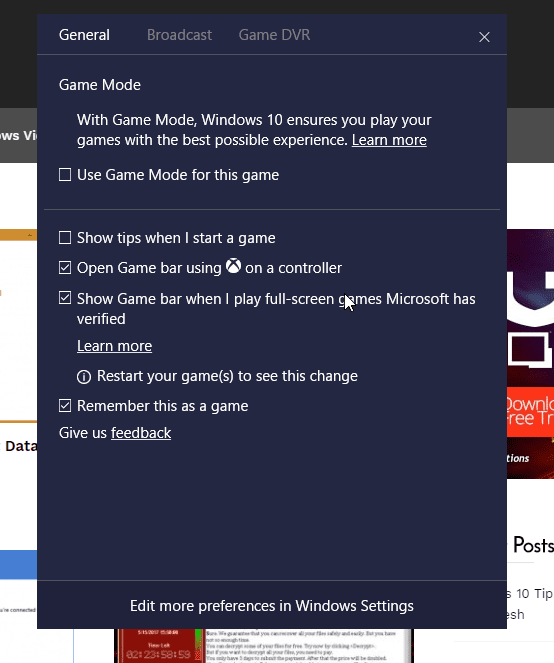
You can also tweak the recording settings by clicking the Gear icon on the Game Bar. Check the option “Record game in the background” to turn on the Background recording.
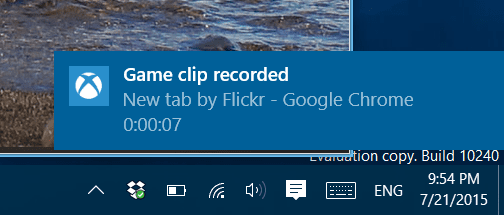
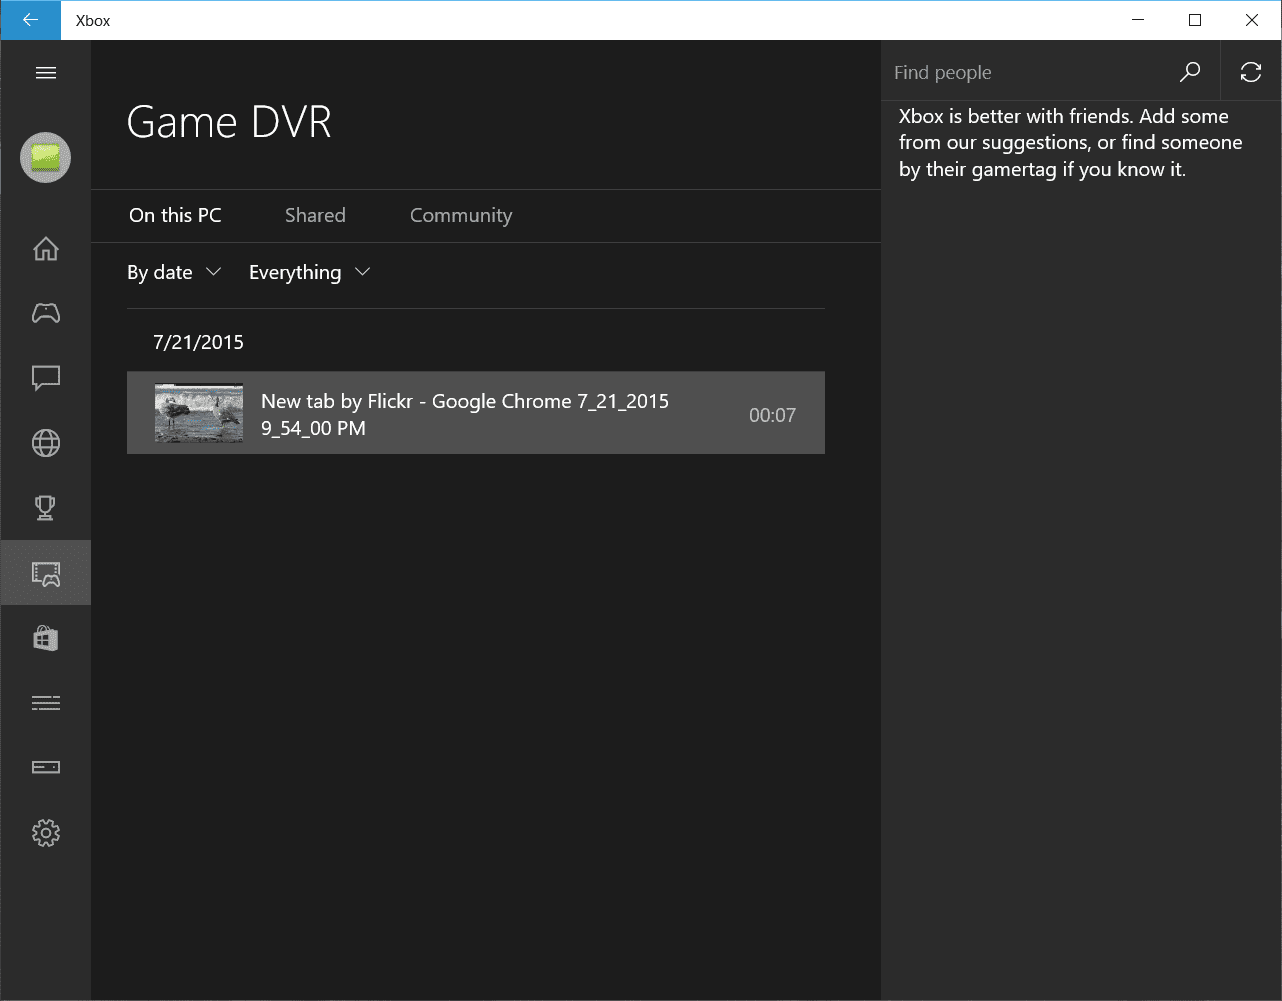
The video is saved under Captures folder in Videos as an MP4 format that you can replay on most of the media player. You can also find the recorded videos in Xbox under Game DVR, and view or edit them right there.
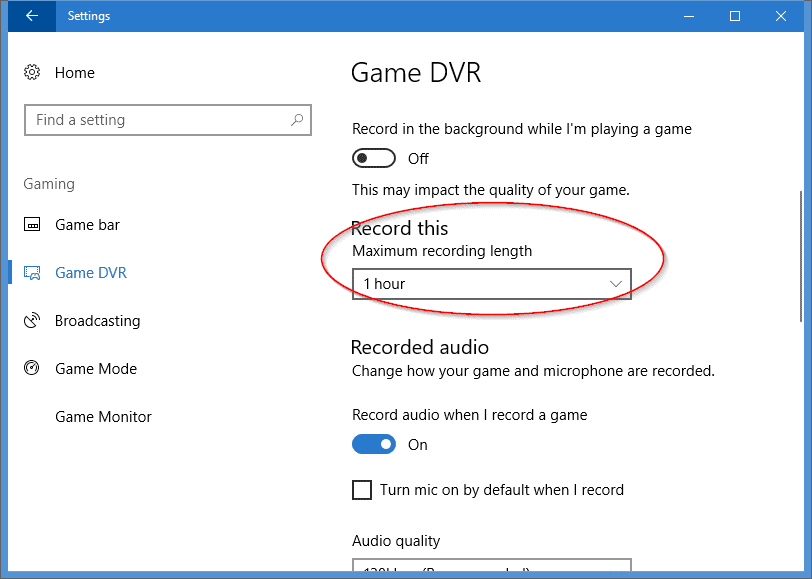
There are a lot more settings you can tweak in Gaming section in the Settings app, such as customizing your own keyboard shortcuts for the Game bar, turning on/off audio recording during broadcasting, deciding whether to use the Game Mode, etc. One thing I’d like to point out is that the duration of a recording is maxed out at 1 hour by default. You can change it to either 30 minutes or 2 hours in Game DVR section. So if you are planning on a longer session, you either use a different screencast tool or make yourself ready during the session so you can keep recording it when the time is maxed out.
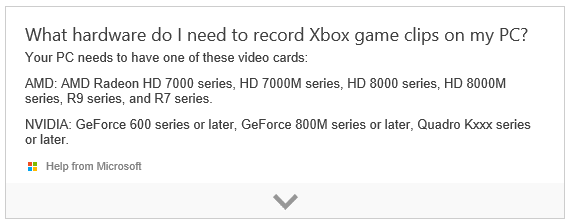
While it’s a very nice feature to have in Windows 10, it also requires some specific hardware to be able to do that. If the Record button is grayed out on your computer after you press Win + G key, that’s because your computer doesn’t have minimum video adapter required installed. Apparently, you will need to following Video Adapters installed to be able to enjoy the built-in screen recording feature.
And if that’s the case, check out these 6 best free screencast recording tools. One of them will perfectly fit your needs and do all the hard job for you.
So how does that help people who do not have an xbox.
The feature exists in Windows that doesn’t require Xbox to use it.
The built-in recorder is quite simple to use, but users should note that sometimes it captures video in blank screen, this is mainly because that some game does not allow for recording. Lucky me, I find another alternative tool which called Acethinker screen recorder, it can record any screen activity with audio. And more importantly, it’s free as well.
which screen recording you have ues
Where to see the file location
The recorded media should be saved in either Videos or Pictures folder.
It is complete garbage. You can only record one app at a time, so if you’re trying to record a screencast, and you want to switch from a browser to, say, a Word doc, the recording stops.
Complete trash for any kind of robust screen capture presentations.
Thanksa lot for the info but would be good to give the links to download from .
It is so sweat of you to post such details. I would like to know whether game bar and game dvr are the same things…I am so confused about this. I’ve tried one of them when my friend suggested me, but the recorded gameplay video has no sound. I like recording my game videos with internal audio and my microphone sound. Then I found Joyoshare VidiKit because it can record gameplay with internal audio and microphone very well. I would like to recommend it to you because it is easy-to-use. If you need, you can really have a try.