

On Windows 11, the display language is used on the operating system and its user interface. So, this language pops up in elements such as dialog boxes, menus, and system messages. You may install several display languages, especially if you need to use your computer in several languages. Still, you may also have good reason to remove an unwanted display language from Windows 11.
While having several installed display languages should not cause conflicts in some cases, some apps may not support this feature, and other apps may constantly need restarting before they change your default language. The process is not always seamless. So, if you want to remove the display language on your Windows 11 devices, follow the steps below.
How Do I Remove a Windows Display Language in Windows 11?
1. Removing an Unwanted Display Language via the Settings App
Windows 11 Settings is the central location on the OS where you may configure or manage all your computer settings. It replaces most features included in the Control Panel of older OS editions. As shown below, you may use its Language and Region settings to update your display language.
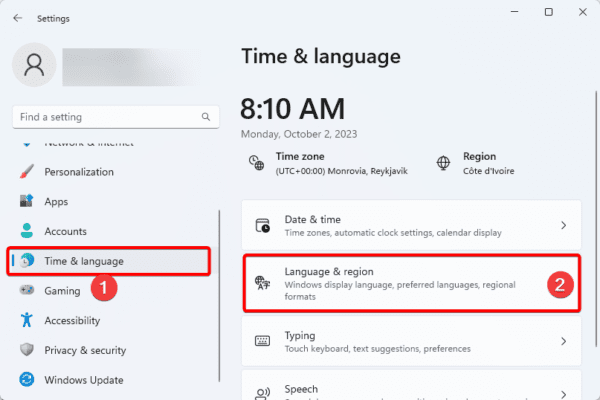
Step 1: Press Windows + I to launch the Windows 11 Settings app.
Step 2: Click Time & Language on the left pane, then on the right, select Language & region.
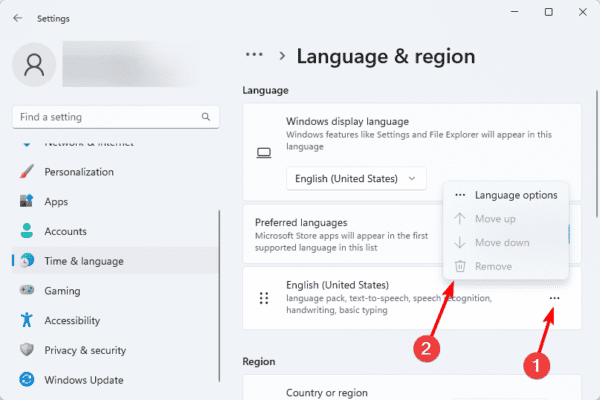
Step 3: Click the ellipses (3 horizontal dots) for the display language you want to remove, then select Remove.
2. Removing a Display Language Via the Registry Editor
Windows 11 Registry Editor is a robust utility for managing the operating systems registry, containing a hierarchical database that stores all configuration settings. You may use the registry to make changes to appearance, including configuring the display language.
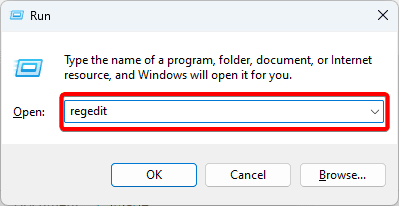
Step 1: Press Windows + R to launch the Run dialog.
Step 2: Type regedit and hit enter to open the Registry Editor.
Step 3: Navigate to the path below:
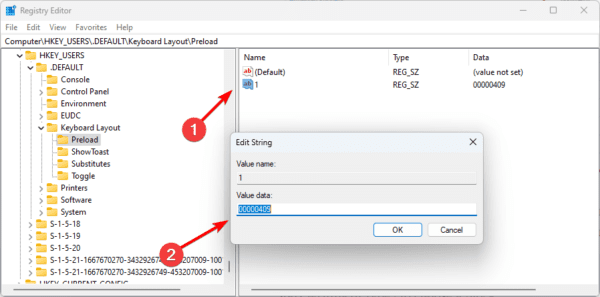
HKEY_USERS.DEFAULT\Keyboard Layout\Preload
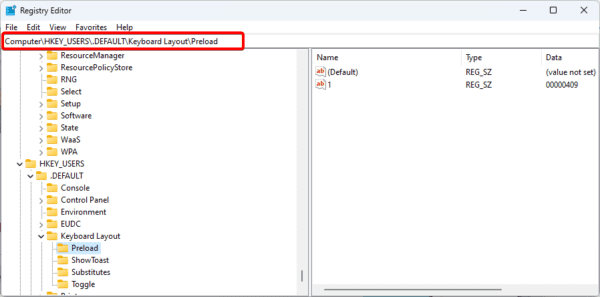
Step 4: On the right pane, your display languages should be listed as figures counting from 1.
Step 5: Visit the Windows 11 keyboard identifying site to find the code of the language you need to remove. Here, each language is associated with an identifier.
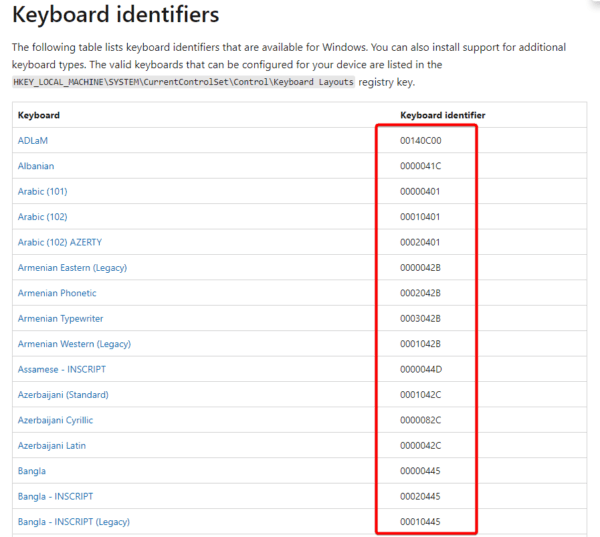
Step 6: Return to the registry Editor and double-click on a key on the right pane. If its value data corresponds with the keyboard identifier you want to remove, press delete the key.
Step 7: Navigate to the registry paths below and perform the same process in steps 5 and 6 to delete associated display languages.
HKEY_USERS.DEFAULT\Control Panel\International\User Profile
HKEY_CURRENT_USER\Keyboard Layout\Preload
HKEY_USERS.DEFAULT\Control Panel\International\User Profile System Backup
3. Removing a Display Language Via Windows PowerShell
On Windows 11, PowerShell is used for configuration management and task automation. It is composed of a command-line shell and the linked scripting language. Among the many functions it may perform, you can use it to remove a display language on Windows 11.
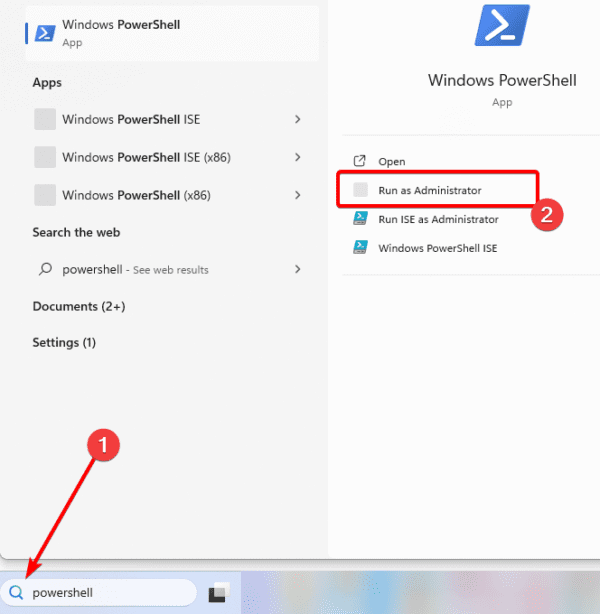
Step 1: Press the Taskbar’s magnifying lens, type powershell, and click the Run as Administrator option.
Step 2: View your installed language packs by typing the script below and hitting Enter.
Get-WinUserLanguageList
Step 3: Take note of the Language Tag of the language you want to remove. For US English, the tag is en-US.

Step 4: Run the script below to assign the results of the language packs to the LangList variable.
$LangList = Get-WinUserLanguageList
Step 5: Run the command below, replacing Language_Tag with your actual LaguageTag value.
$MarkedLang = $LangList | where LanguageTag -eq Language_Tag
Step 6: Remove the selected language by running the command below:
$LangList.Remove($MarkedLang)
Step 7: Finally, run the command below and restart your computer.
Set-WinUserLanguageList $LangList -Force
FAQ on Windows 11 Display Language
1. What is the shortcut key for the language switch in Windows 11?
On Windows 11, you may use the hotkeys Left Alt + Shift to change your keyboard language.
2. How do I turn off language switch shortcuts in Windows 11?
You may turn off this setting from the Time and Language menu of the Settings app.
Final Thoughts
The Windows 11 display language is a nifty feature you may want to enable for more functionality on a Windows computer. However, if it poses any conflicts, you may remove it using the steps highlighted in this guide.
Lastly, please let us know if you have successfully used the solutions in this guide. Also, you may want to learn how to change the Windows 10 display language to a non-English language.