The easiest way to get a folder list in tree view in Windows is to use a command line called Tree. But you will be out of luck if you want to do the same directly in File Explore, previously called Windows Explorer in Windows 7, which is oddly enough considering Windows Explorer is the primary tool in Windows for navigating folders and files.
But I am going to show you a pretty neat trick in this post that lets you to export a folder structure in tree view right from File Explorer.
Before we start, let’s take a quick look how the command line Tree works because we will be firing this command right from File Explore to get the tree view of a specific folder.
The syntax is pretty easy:
Tree [drive:][path] [/F] [/A]
Where /F is to list the files in addition to each folder, and /A is to output the structure to a text file. So we will be using both the switches to export the data.
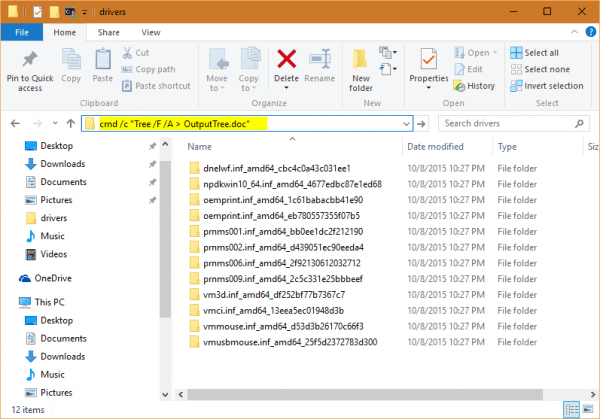
Now open File Explorer, navigate to the folder you want to export its structure. In my case, it’s “c:\drivers”.
Then, type the following command in the address bar in File Explorer.
cmd /c "Tree /F /A > OutputTree.doc"
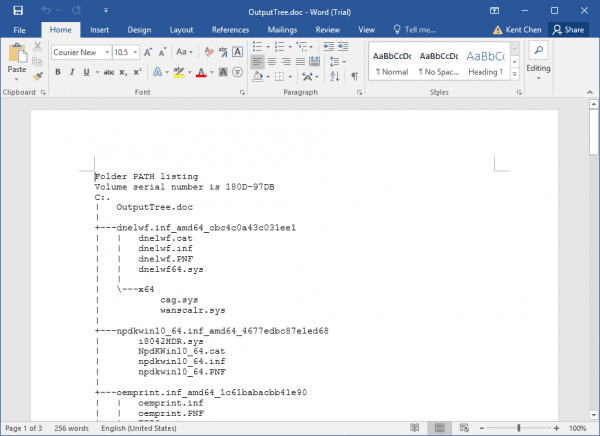
Press Enter, and a file called OutputTree.doc will be saved in the current folder shortly after. It has the full structure of the current folder listed in tree view. Double click it to open to see what looks like.
Obviously, you can change the extension name to .txt to save as a pure text file as well.


