

Netsh is a command-line and scripting utility in Windows for network components. It’s a useful tool for network administrators to configure and monitor Windows systems through a command prompt console. But it’s ok if you are not familiar with this command because now you can switch your focus to PowerShell to use it to accomplish many things that Netsh does in the past.
And here are a few samples how we can use PowerShell to execute them that previously required to use Netsh.
List network adapters
The cmdlets you need is
Get-NetAdapter
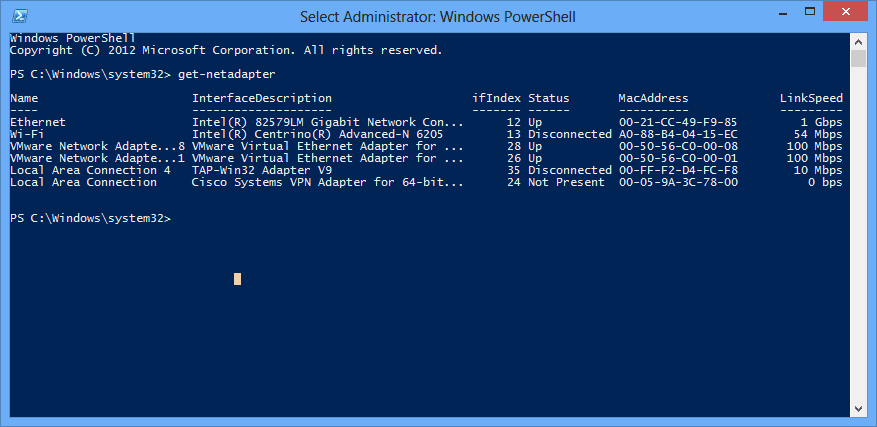
It comes with a switch -IncludeHidden that shows hidden adapters that you won’t be able to see from a graphic interface.
Disable and enable network adapters
With these 2 cmdlets, you don’t have to go through GUI to disable and enable network adapters. Should be handy, right?
To disable: Disable-NetAdapter -name "name of the adapter"
To enable: Enable-NetAdapter -name "name of the adapter"
You can get the name of the adapter from the first cmdlet Get-NetAdapter.
Show TCP/IP information
It’s much like ipconfig, a command we are all very familiar with.
Get-NetIpConfiguration

With the switch -Detailed, you can see a much detailed information, IPv4 and IPv6 addresses, gateway address and its status, DNS server addresses, etc.
Set a new static IP address
The following cmdlets are to set the IP address of the network adapter named Ethernet to 192.168.001.010 and the gateway to 192.168.001.001.
$netadapter = Get-NetAdapter -Name Ethernet
$netadapter | New-NetIpAddress -IPAddress 192.168.001.010 -PrefixLength 24 -DefaultGateway 192.168.001.001
The first command is to get the name of the network adapter and set it to the variable netadapter for the second command to set up the network IP address.
Change the network adapter to use DHCP
The following commands can be used to re-configure a specific network adapter to use a DHCP assigned address:
$netadapter = Get-NetAdapter -Name Ethernet
$netadapter | Set-NetIPInterface -Dhcp Enabled
Enable and disable Windows Firewall
Here is how you can use PowerShell to quickly enable and disable windows firewall on your computer:
To enable: Set-NetFirewallProfile -Profile Domain, Public, Private -Enabled True
To disable: Set-NetFirewallProfile -Profile Domain, Public, Private -Enabled False
That’s it for today. I will be showing you some cool features in Netsh next time.
/via Windows IT Pro/