

On Windows 10 and 11, the Windows Search Indexer runs in the background. It makes searching faster and easier by indexing your files and folders. This service may index documents, images, videos, email messages, Outlook items, and more. However, users have complained about high CPU usage by the Windows Search Indexer.
If you are facing this problem on your devices, we introduce some of the most practical solutions in this guide.
Why is Search Indexer using so much CPU?
The following may lead to Windows Search Index using so many system resources and CPU.
- Windows Search Index needs to keep a large index updated.
- The Search Index needed to repair corruption or rebuild.
- A slow drive that makes the service spend more time indexing.
Regardless of the reason, you may try the solutions below.
1. Run Windows Disk Check Utility
CheckDisk or chkdsk is a tool that will scan your hard disk for errors. The utility can fix bad sectors on a drive and logical errors like file system corruption. These errors may slow your disk, leading to the high CPU usage by the Windows Search Indexer. Here is how to use the chkdsk utility:
Step 1: Press Windows + R to open the Run dialog.
Step 2: Type cmd and hit Ctrl + Shift + Enter to open an elevated Command Prompt.

Step 3: Type the command below and hit Enter to run the Check Disk utility.
chkdsk /f

Step 4: Press Y to allow the utility to run the next time the computer boots.
2. Run the SFC and DISM Scans
Like the Disk Check utility, a System File Checker can repair corruption in the disk. It would be best to run it with the DISM scan, which will repair any damage to the Windows image that may lead to high CPU usage.
Step 1: Press Windows + R to open the Run dialog.
Step 2: Type cmd and hit Ctrl + Shift + Enter to open an elevated Command Prompt.
Step 3: Type the command below and hit Enter to run the System File Checker utility.
sfc /scannow

Step 4: Follow the prompts on the terminal to complete the process.
Step 5: Type the commands below and hit Enter after each one to check the drive’s health, scan, and repair it.
DISM /Online /Cleanup-Image /CheckHealth
DISM /Online /Cleanup-Image /ScanHealth
DISM /Online /Cleanup-Image /RestoreHealth

Step 5: Restart the device and confirm that the fix resolved the high CPU usage caused by the Windows Search Indexer.
3. Reduce the Number of Indexing Locations
Since a large number of items for indexing is a common cause of increased CPU usage, reducing the number of locations your OS indexes decreases the amount of work the indexer does and the amount of system resources it consumes.
Step 1: Press Windows + R to open the Run dialog.
Step 2: Type control.exe srchadmin.dll and hit Enter to open Indexing Options.

Step 3: Click the Modify button at the bottom left.

Step 4: Click on the arrow for your installation drive to expand it, then deselect as many checkboxes as possible to reduce the number of indexing locations.
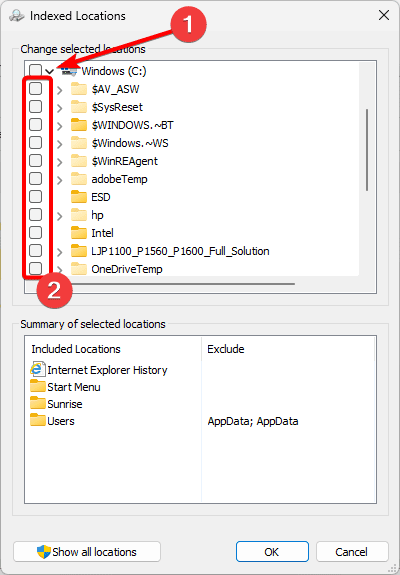
Step 5: Lastly, click the OK button and check if the solution successfully resolved the high CPU usage caused by the Windows Search Indexer.
4. Rebuild the Windows Search Index
This solution is effective when you get the error from a damaged index. The indexing option comes with a rebuild setting, which you may use, as shown in the steps below.
Step 1: Press Windows + R to open the Run dialog.
Step 2: Type control.exe srchadmin.dll and hit Enter to open Indexing Options.
Step 3: Click the Modify button at the bottom left.
Step 4: Select your Windows installation, deselect every other option, then click OK.

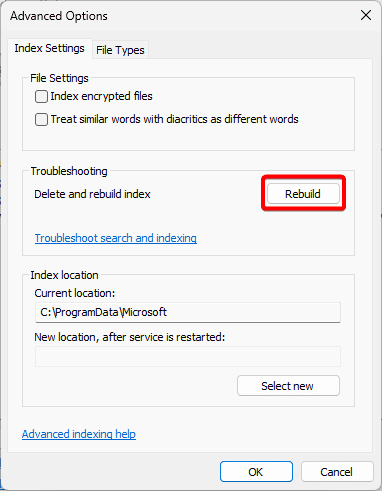
Step 5: Click the Advanced button of the Indexing Options window.

Step 6: Click the Rebuild button, and the process should correct the Windows Search Indexer’s high CPU usage.
5. Restart the Windows Search Indexer
As you may expect, if Windows Search Indexer causes high CPU usage, disabling it will fix the issue, as the utility will no longer run on your computer. The steps below will help; however, you may expect fast and easy file search not to work.
Step 1: Press Windows + R to open the Run dialog.
Step 2: Type cmd and hit Ctrl + Shift + Enter to open an elevated Command Prompt.
Step 3: Type the script below and hit Enter to stop the Windows Search service.
net.exe stop Windows Search

Step 4: Restart the computer.
Step 5: Perform steps 1 and 2 to open an elevated Command Prompt, then input the script below to restart the indexer.
net.exe restart Windows Search
6. Disable all Startup Applications
Startup applications add to the amount of system resources your computer uses. If you have many applications that are launched at startup, it may be impossible for the Windows Search Indexer to run without a spike in CPU usage. You may delete these apps using the steps below.
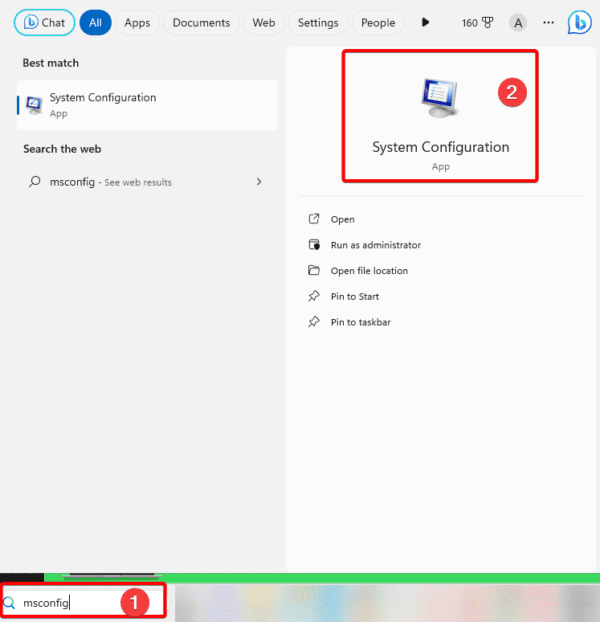
Step 1: Click the magnifying lens on the Taskbar, type msconfic, and click the System Configuration option.
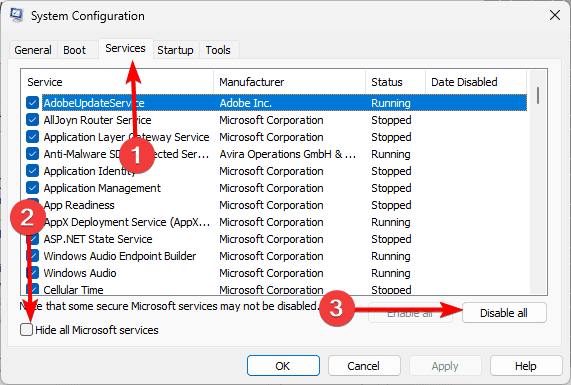
Step 2: Click the Services tab, tick the checkbox for Hide all Microsoft services, and click the Disable all button.
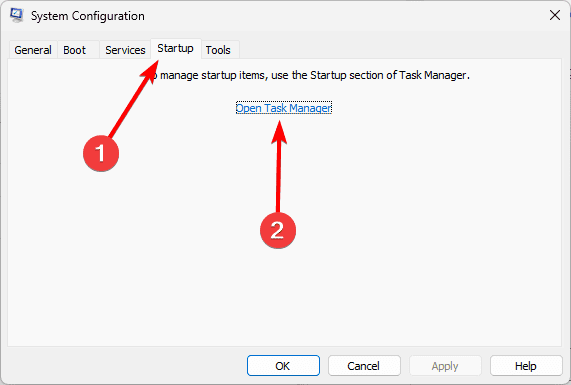
Step 3: Navigate to the Startup tab and click Open Task Manager.
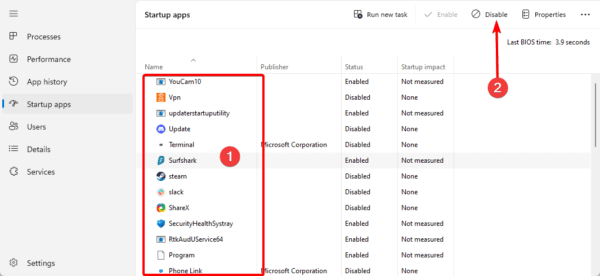
Step 4: Close as many startup apps as possible by clicking on any and clicking the Disable option.
FAQ on the Windows Search Indexer High CPU Usage
1. Can I end Microsoft Windows Search Indexer?
Yes, it is possible, and one of our solutions details how you may end this process, but note that you will no longer benefit from fast Windows search.
2. Should search indexer be on or off?
We recommend enabling this feature unless you are facing specific problems relating to search.
3. Does indexing slow down computer?
Indexing may slightly impact general PC speed, but this isn’t very noticeable on any functional computer.
Wrapping Up: Enjoying Normal CPU Consumption
You will find that all the solutions discussed above are very effective for the Windows Search Indexer issue. We have not written them in any particular order and recommend you try whichever solution feels the most practical. You may try different solutions till the problem is fixed.
High CPU usage may cause crashes and should be avoided at all costs. We also recommend constant malware scans, which may contribute to CPU usage.