TRIM is a special ATA command that allows the operating system to inform a solid-state drive (SSD) drive which blocks of data are no longer considered in use and thus can be wiped internally. It’s an SSD-related term that can be ignored if you don’t have one installed on your computer. TRIM is crucial to an SSD drive as it’s the only communication channel that tells the SSD drive which block of data can be overwritten and which ones can’t. It manages the performance of SSD drives at a good state over the entire life span.
On Windows 7 and above, including Windows 10, TRIM is enabled by default on solid-state drives. When enabled, Windows will send a TRIM command to instruct your SSD every time you delete a file. The SSD drive will then automatically erase that file on the block accordingly.
Normally you shouldn’t need to worry about whether the TRIM is enabled or not since it’s been taken care of at operating system level. But if you just would like to double-check and make sure, here is
How to check if TRIM is enabled
Open an elevated command prompt window (command prompt as Administrator), and run the following command.
fsutil behavior query DisableDeleteNotify
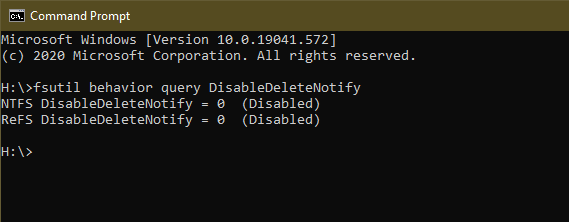
It launches fsutil, a Windows built-in file system command line, to query whether the Delete Notification is enabled or disabled. You will see the result like below:
NTFS DisableDeleteNotify = 0, which means TRIM is disabled, or
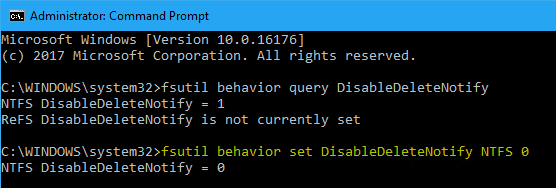
NTFS DisableDeleteNotify = 1, meaning that TRIM is enabled, like the screenshot below.
On Windows 10, it also checks if TRIM is enabled on a ReFS file system as well.
ReFS DisableDeleteNotify = 0, meaning that TRIM is disabled, or
ReFS DisableDeleteNotify = 1, meaning that TRIM is enabled.
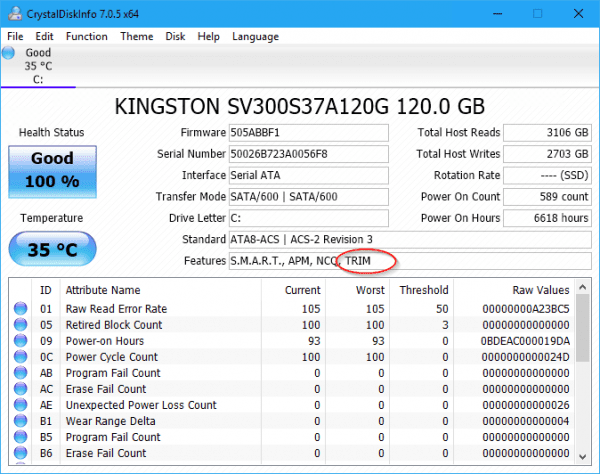
You can also use a tool like CrystalDiskInfo as well.
How to enable TRIM
As I mentioned earlier, Windows should automatically take care of TRIM for us. But if you notified that the TRIM isn’t enabled and you would like to enable it, you can run the following command in an elevated command prompt window.
fsutil behavior set DisableDeleteNotify NTFS 1
Or the following on a ReFS file system.
fsutil behavior set DisableDeleteNotify ReFS 1
Once done, run the following to double check.
fsutil behavior query DisableDeleteNotify
Enabling and disabling TRIM doesn’t require a restart, nor any service restart needed. TRIM is effective when the next unmap command is issued.
Windows 10 also adds some new management features that made TRIM a more user-friendly feature. Check out this post for more information about TRIM on Windows 10 and how Windows 10 handles ReTRIM on a schedule.


For some reason, on my version of Windows 10, 0 = Disabled and 1 = Enabled.
same here, this tutorial needs an update
Thank you for pointing it out. Yes, it’s indeed changed in recent releases.
The post has now been updated.
0 vs 1 for being enabled is odd. “DisableDeleteNotify = 1, meaning that TRIM is enabled” is the opposite of dozens of other sites regarding this.
Logically, if delete notifying is disabled (1 for the value), then TRIM is disabled.
Conversely, if delete notifying isn’t disabled (0 for the value), then TRIM is enabled.
No?